You can find many blog posts and tutorials about how to perform cryptography functions using .Net and Bouncy castle. But it is hard to find information about performing fully featured crypto implementations with .Net core 2.0 as of this day of writing. This blog post will introduce you to the .Net core 2.0 based encryption and signing process.
When it comes to encryption, we can identify two main variations as Symmetric Key encryption and Asymmetric Key encryption. The Symmetric key encryption is straight forward and easy to implement because it is using the same key to perform encryption and decryption. In Symmetric key encryption, we always need to find a proper way to share the secret shared key securely. We are focusing on Asymmetric key encryption in this blog post.
Encryption using Public and Private Key pairs
The first exercise we are going to do is performing encryption. Bob will encrypt a message using Alice's public key and sends the message to Alice. Then Alice can decrypt the message using her private key.

In order to perform this Alice needs to create a key pair and distribute her public key securely to Bob and persist her private key securely.

First of all we need to create this key generation application. For ease of demonstration I will create console application to perform this operation. Please create a .Net core 2.0 console application.
You need to add required nuget packages as follows.
Install-Package Portable.BouncyCastle -Version 1.8.1.3
We are going to use Portable Bouncy castle by onovotny. A big thank goes to him.
The fist method I'm implementing is GenerateKeys. This method generates a key pair using given key size and secure random generator build-in in the Bouncy castle package. The method returns AsymmetricCipherKeyPair. We are using RSA asymmetric encryption algorithm to perform this key generation.
private static AsymmetricCipherKeyPair GenerateKeys(int keySizeInBits)
        {
            var r = new RsaKeyPairGenerator();
            CryptoApiRandomGenerator randomGenerator = new CryptoApiRandomGenerator();
            r.Init(new KeyGenerationParameters(new SecureRandom(randomGenerator), keySizeInBits));
            var keys = r.GenerateKeyPair();
            return keys;
        }
In the Main method, Im gonna consume this GenerateKey method and extract private and public keys separately. Please note that in order to display the keys I'm converting them to base64 encoded strings. But in a real application you should convert keys into strings. Especially the private keys. Because strings are immutable in the memory and any memory attack can get hold in to our pvt keys easily. it is always better to keep them as byte arrays in the memory when ever we are using them.
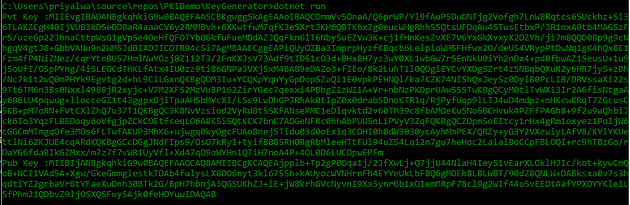
The application output should display as follows.


Note that we are using slightly different method to load the private key parameters compared how we have load the public key parameters.


var keys = GenerateKeys(2048);

   PrivateKeyInfo privateKeyInfo = PrivateKeyInfoFactory.CreatePrivateKeyInfo(keys.Private);
   byte[] serializedPrivateBytes = privateKeyInfo.ToAsn1Object().GetDerEncoded();

   SubjectPublicKeyInfo publicKeyInfo = SubjectPublicKeyInfoFactory.CreateSubjectPublicKeyInfo(keys.Public);
   byte[] serializedPublicBytes = publicKeyInfo.ToAsn1Object().GetDerEncoded();

   Console.WriteLine("Pvt Key :" + Convert.ToBase64String(serializedPrivateBytes));
   Console.WriteLine("Pub Key :" + Convert.ToBase64String(serializedPublicBytes));

   Console.Read();
The application output should display as follows.
We can save these two values to test encryption and decryption process.
Now we need to pass the public key securely to Bob.
Encryption using Alice's Public key
Now Bob has Alice's public key. So the next step is encrypt a secret message in order send to Alice. I'm going to create a new .Net core console application to perform this as follows. The Encrypt method accepts the public key and the message that needs to encrypt.
public static  string Encrypt(byte[] pubKey, string txtToEncrypt)
        {
            RsaKeyParameters publicKey = (RsaKeyParameters)PublicKeyFactory.CreateKey(pubKey);

            RSACryptoServiceProvider rsa = new RSACryptoServiceProvider();
            RSAParameters rsaParameters = new RSAParameters();
            rsaParameters.Modulus = publicKey.Modulus.ToByteArrayUnsigned();
            rsaParameters.Exponent = publicKey.Exponent.ToByteArrayUnsigned();
            rsa.ImportParameters(rsaParameters);

            byte[] bytes = Encoding.UTF8.GetBytes(txtToEncrypt);
            byte[] enc = rsa.Encrypt(bytes, false);
            string base64Enc = Convert.ToBase64String(enc);

            return base64Enc;
        }
The most important thing in this method is importing the Modulus and Exponent of the key as RSA parameters.
Following is the output of the program when we pass in the pub key and the message to encrypt as console params.

Decryption using Alice's Private key
Now Alice will receive this message and she needs to decrypt this using her private key. Now Alice needs to use her persisted pvt key. I have created a separate application for the decryption process as well ( Most of the crypto examples you can see in the Internet are using only one application to demonstrate this key generation , encryption and decryption process. . But you will never see such applications in real life).
The Decryption process depicts in the following method where it accepts the private key and the encrypted message.
public string Decrypt(string pvtKey, string txtToDecrypt)
        {
            RsaPrivateCrtKeyParameters privateKey = (RsaPrivateCrtKeyParameters)PrivateKeyFactory.CreateKey(Convert.FromBase64String(pvtKey));
            RSACryptoServiceProvider rsa = new RSACryptoServiceProvider();

            RSAParameters rsaParameters2 = DotNetUtilities.ToRSAParameters((RsaPrivateCrtKeyParameters)privateKey);

            rsa.ImportParameters(rsaParameters2);

            byte[] dec = rsa.Decrypt(Convert.FromBase64String(txtToDecrypt), false);
            string decStr = Encoding.UTF8.GetString(dec);

            return decStr;
        }
Note that we are using slightly different method to load the private key parameters compared how we have load the public key parameters.

You can see in this picture that the message being decrypted successfully.
Message Signing
Message signing is another application in the PKI domain. A signed message ensures the integrity of the message and we can verify the sender as well.

The message signing process uses Alice's private key to sign the message. In this example we are using the SHA256 algorithm as the signing algorithm along with the private key.
Again, I have created a different application to perform this signing operation. The Sign method depicted below would perform the signing process.
static string Sign(byte[] pvtKey, string msgToSign)
        {
            RsaPrivateCrtKeyParameters privateKey = (RsaPrivateCrtKeyParameters)PrivateKeyFactory.CreateKey(pvtKey);
            RSACryptoServiceProvider rsa = new RSACryptoServiceProvider();

            RSAParameters rsaParameters = DotNetUtilities.ToRSAParameters((RsaPrivateCrtKeyParameters)privateKey);

            rsa.ImportParameters(rsaParameters);
            byte[] dataBytes = Encoding.UTF8.GetBytes(msgToSign);
            byte[] signedBytes = rsa.SignData(dataBytes, "SHA256");

            return Convert.ToBase64String(signedBytes);

        }
Following is the output of the Signature program for a given text.

Message Signature Verification
So once Bob get the message along with its signature , he needs to verify it using Alice's public key.
A different program being developed for this verification process. The Verify method verifies the signature along with the original message.
public static  bool Verify(byte[] pubKey, string originalMessage, string signedMessage)
        {


            RsaKeyParameters publicKey = (RsaKeyParameters)PublicKeyFactory.CreateKey(pubKey);

            RSACryptoServiceProvider rsa = new RSACryptoServiceProvider();
            RSAParameters rsaParameters = new RSAParameters();
            rsaParameters.Modulus = publicKey.Modulus.ToByteArrayUnsigned();
            rsaParameters.Exponent = publicKey.Exponent.ToByteArrayUnsigned();
            rsa.ImportParameters(rsaParameters);

            byte[] bytesToVerify = Convert.FromBase64String(originalMessage);
            byte[] signedBytes = Convert.FromBase64String(signedMessage);


            bool success = rsa.VerifyData(bytesToVerify, CryptoConfig.MapNameToOID("SHA256"), signedBytes);

            return success;
        }
You can find all source code in a one solution in following git repo.
